This complete list of Tech Deck tricks covers everything from your first ollie to advanced 360 flips, grinds and slides. You will learn the right finger placement for your fingerboard, the best order to learn tricks in, a 10 minute daily drill, and the gear you need. Each trick includes its difficulty, what it teaches, and the skill you need first, so you know your next step.
You just landed your first ollie, and now you want to know what comes next. That is exactly what this page answers. This is the complete list of Tech Deck tricks for 2026, ordered from easiest to hardest, so you always know which trick to learn next and which skills you need first.
You will find 18 tricks here, split into three levels. Level 1 builds your base with the ollie, shuvit and manual. Level 2 adds flips and turns like the kickflip and frontside 180. Level 3 brings the big tricks, like the 360 flip, hardflip and 50-50 grind.
For every trick you get its difficulty, what it teaches you, and the trick you must learn before it. You also get finger placement basics, a 10 minute drill, a weekly plan, gear advice and common beginner mistakes. Bookmark this page and work through it one trick at a time.
What Are Tech Deck Tricks?
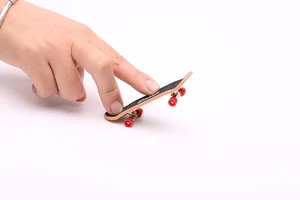
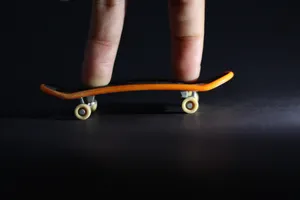
Tech Deck tricks are the flips, spins, grinds and slides you perform on a miniature skateboard with your index and middle fingers. Your index finger works as your front foot and your middle finger works as your back foot. Every trick on this page mixes five basic moves: pop, slide, scoop, flick and balance.
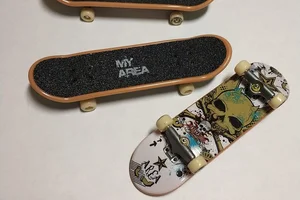
A Tech Deck is a small skateboard, about 96mm long, with real trucks, wheels and grip tape. It behaves like a full size skateboard, only smaller, so the same trick names and ideas apply. The ollie lifts the board, the kickflip spins it, the shuvit turns it, and the grind slides it along a ledge.
- Pop. You press the tail down hard so the nose lifts, and this move starts the ollie, the kickflip and most grinds. Without a clean pop, the board never leaves the table.
- Slide. You drag your index finger forward across the grip tape to level the board in the air. This move turns a nose high jump into a flat, controlled ollie.
- Scoop. You push the tail sideways in a curve, and this move spins the board for shuvits, varial flips and 360 flips. The scoop is one of the most important moves in fingerboarding.
- Flick. You slide your index finger off the edge of the board, and this move flips the board for kickflips and heelflips. A small fingertip flick works better than a big one.
- Balance. You hold the board on two wheels or on a rail, and this skill keeps manuals and grinds going. Balance comes from tiny finger pressure changes, not from force.
How Do You Use This Tech Deck Tricks List?
Work through this list in order and do not skip Level 1. Each level builds on the one before it, and the skills from Level 1 show up in every trick after it. Aim to land each trick five times in a row before you move to the next level.
- Level 1, Beginner. Learn these five tricks first with a flat surface, a Tech Deck and ten minutes a day. Most riders need a few weeks to finish this level.
- Level 2, Intermediate. Start these once your ollie and shuvit are solid, because they add flips and turns to the ollie you already know. Expect a few months of practice here.
- Level 3, Advanced. Start these once your Level 2 tricks are solid, because they need strong pop, clean timing and good board control. Plan on several months for this level.
The full step by step guides for the beginner tricks are already live on this site, and the other guides follow the same format. Use the links in each trick section to open the full guide when you are ready to learn it.
What Finger Placement Do You Need for Tech Deck Tricks?
Every trick on this list starts with the same finger placement, so learn it once and use it everywhere. Your middle finger sits on the tail and your index finger sits just behind the front bolts. Keep both fingers slightly curved and relaxed, not stiff and straight.
Your middle finger does most of the popping and scooping. Your index finger does most of the levelling, flicking and catching. If a trick feels impossible, check your finger placement first. Nine times out of ten, the problem is there, not in your timing.
- Middle finger on the tail. Place it near the centre of the tail for pops, and move it to the tail edge when you need to scoop. It presses down sharply to lift the nose.
- Index finger behind the front bolts. Place it near the middle of the board with light, even pressure. It slides forward to level the board and flicks off the edge to flip it.
- Hand low and close. Keep your hand low, close to the board, with a loose wrist. Your hand should move with the board, not hover above it.
You also need a board in good condition. Check that all four wheels spin freely and that the grip tape still grips. A stuck wheel or smooth grip will make every trick harder.
A standard Tech Deck in good condition is enough to learn every trick on this list. Practise on a flat, hard surface like a desk or table, and clear a small space so the board can roll and land safely.
What Are the Beginner Tech Deck Tricks?
Level 1 has five beginner tricks, and they teach the five moves every harder trick needs. Learn them in this order: ollie, shuvit, manual, pop shuvit and nose manual. Each one takes a few days to a few weeks of short daily practice.
- Ollie. The jump that lifts your board off the table and levels it in the air. It teaches pop, slide and landing, and almost every other trick starts with it.
- Shuvit. The board spins 180 degrees under your fingers without flipping. It teaches the scoop, one of the most important moves in fingerboarding.
- Manual. You balance on the two back wheels while the board keeps rolling. It teaches balance and tiny finger pressure adjustments.
- Pop Shuvit. A shuvit with a pop, so the board jumps while it spins. It teaches you to combine pop and scoop in one motion.
- Nose Manual. You balance on the two front wheels with the tail in the air. It teaches reverse balance and front finger control.
1. Ollie
The ollie is the foundation of fingerboarding, and it is the first trick you should learn.
- How it works. You pop the tail down with your middle finger, slide your index finger forward to level the board, and land on all four wheels.
- What it teaches. It teaches pop, slide and landing, and these three moves show up in almost every other trick on this list.
- How long it takes. Most beginners land a small ollie in a few days, and a clean rolling ollie takes two to four weeks of daily practice.
- Full guide. Read the full step by step guide here: How to Ollie on a Tech Deck.
From real use, riders who practise ten minutes a day land their first clean ollie in about a week.
2. Shuvit
The shuvit spins the board 180 degrees without flipping it, and it is the best second trick to learn after the ollie.
- How it works. You scoop the tail sideways with your middle finger, lift both fingers a little, and catch the board after it turns halfway around.
- What it teaches. It teaches the scoop, the sideways push your back finger gives the tail. This move shows up in pop shuvits, varial flips and 360 shuvits.
- How long it takes. Most riders who can already ollie land a shuvit within a week of short daily practice. Learn it standing still first, then try it rolling.
Think of the scoop like scooping ice cream: a short, quick curve, not a long drag across the board.
3. Manual
The manual balances the board on its two back wheels while it keeps rolling forward.
- How it works. You lift the nose with a gentle press from your index finger and hold the balance with tiny pressure changes. The front wheels stay in the air.
- What it teaches. It teaches balance and finger pressure, and it connects tricks together. Riders ollie into a manual, hold it, then pop out with another trick.
- How long it takes. A one second manual takes a few days, and a steady two to three second manual takes a few weeks of daily practice.
From real use, a slow, steady roll makes the manual much easier than trying it from a standstill.
4. Pop Shuvit
The pop shuvit is a shuvit with a pop, so the board jumps into the air while it spins.
- How it works. You pop the tail like an ollie at the same moment as you scoop, so the board leaves the table and turns 180 degrees in the air.
- What it teaches. It teaches you to combine pop and scoop in one motion, which is the base skill for varial flips and 360 flips later.
- How long it takes. Learn the regular shuvit first, then add the pop. Most riders land a pop shuvit a few days after their shuvit is solid.
Keep the pop small at first. The spin is the same as a shuvit, only the height changes.
5. Nose Manual
The nose manual is the reverse of a manual, and you balance on the two front wheels instead.
- How it works. You press gently with your index finger to lift the tail, and you hold the balance while the board rolls. The tail stays in the air.
- What it teaches. It teaches reverse balance and front finger control, which feels strange at first because your front finger does the main work.
- How long it takes. Learn the regular manual first, then try the nose manual once you can hold a manual for two or three seconds. Expect about a week of practice.
Start on a smooth floor with a slow roll, because speed keeps the balance point steady.
What Are the Intermediate Tech Deck Tricks?
Level 2 has six intermediate tricks that add flips and turns to your ollie. Start them once you can land five clean ollies in a row and a shuvit most of the time. These tricks take a few weeks to a few months each.
- Kickflip. An ollie plus a flick that flips the board once in the air. It teaches flip control and it is the most famous flip trick.
- Heelflip. The mirror image of a kickflip, with the board flipping the other way. It teaches reverse flip control.
- Frontside 180. An ollie with a half turn, landing rolling the other way. It teaches turning in the air while keeping the board level.
- Backside 180. The same half turn in the other direction, with your back to the landing. It teaches blind landings and control.
- Varial Kickflip. A kickflip and a shuvit at the same time, so the board flips and spins. It teaches combined flip and spin timing.
- Half Cab. A 180 degree turn while riding fakie, so you land rolling forward. It teaches fakie control and direction changes.
6. Kickflip
The kickflip is an ollie plus a flick, and it is the first flip most riders learn.
- How it works. You pop like an ollie, then flick your index finger off the edge of the board so it flips once. You catch it and land on all four wheels.
- What it teaches. It teaches flip control and catch timing, and it opens the door to heelflips, varial flips and 360 flips.
- How long it takes. Most riders land a kickflip in one to three weeks with ten minutes a day. Do not start it until your ollie is solid.
- Full guide. Read the full step by step guide here: How to Kickflip on a Tech Deck.
From real use, a small fingertip flick works better than a big flick, which sends the board flying.
7. Heelflip
The heelflip is the mirror image of a kickflip, and the board flips the other way.
- How it works. You pop like an ollie, then flick your index finger toward the heel side of the board. The board flips in the opposite direction from a kickflip.
- What it teaches. It teaches reverse flip control and it balances your skills, so you can flip the board in both directions.
- How long it takes. Learn the kickflip first, because the heelflip feels strange until your kickflip is solid. Expect two to four weeks of practice.
Many riders find the heelflip harder at first, because the flick direction feels less natural.
8. Frontside 180
The frontside 180 is an ollie with a half turn, and your chest faces forward during the turn.
- How it works. You pop, turn your hand and the board 180 degrees in the air, and land rolling in the opposite direction. The board stays level through the turn.
- What it teaches. It teaches turning in the air while keeping the board level, and it is the base for full 360 turns later.
- How long it takes. Learn it once your ollie is clean. Most riders land it in one to two weeks of short daily practice.
Turn your shoulders with the board. If your shoulders stay still, the board will not turn.
9. Backside 180
The backside 180 is the same half turn in the other direction, with your back to the landing.
- How it works. You pop, turn 180 degrees with your back toward the direction of travel, and land rolling the other way. You cannot see the landing as clearly.
- What it teaches. It teaches blind landings and board control, and it makes your 180s work in both directions.
- How long it takes. Practise both directions, because most riders are better at one than the other. Expect one to three weeks.
Trust the catch. Keep your fingers over the bolts and let them find the board as it comes around.
10. Varial Kickflip
The varial kickflip combines a kickflip and a shuvit, so the board flips and spins at the same time.
- How it works. You scoop and flick together, so the board does a kickflip and a 180 degree spin in one motion. The scoop and the flick happen at the same moment.
- What it teaches. It teaches combined flip and spin timing, which is the base skill for 360 flips and other advanced combo tricks.
- How long it takes. Learn the kickflip and the shuvit separately first, then combine them slowly. Expect three to six weeks of practice.
Practise the scoop and the flick apart first. When each one is clean alone, put them together.
11. Half Cab
The half cab is a 180 degree turn while riding fakie, so you roll backward and land rolling forward.
- How it works. You pop from a fakie stance, turn halfway around in the air, and land rolling forward. It is a useful trick for changing direction.
- What it teaches. It teaches fakie control and direction changes, which you will need for more advanced tricks later.
- How long it takes. Learn it once your ollie and shuvit are solid. Most riders land it in one to two weeks.
Start rolling fakie slowly on a smooth floor, because fakie balance feels odd until you get used to it.
How Can You Practise Tech Deck Tricks in 10 Minutes a Day?
Ten focused minutes a day beats an hour once a week, and this drill works for any trick on this list. Use it for your focus trick, then finish with a trick you already know. Stop on a good landing so you remember the right feeling.
- Minutes 0 to 2, warm up. Roll the board forward and back and pop the tail lightly five times. Feel the snap and check your finger placement.
- Minutes 2 to 6, slow tries. Try your focus trick slowly and count clean landings out of ten. Go slow on purpose, because slow practice builds clean timing.
- Minutes 6 to 8, rolling tries. Try the trick while rolling, not standing still, because rolling tricks are the ones you will actually use. Land and keep rolling.
- Minutes 8 to 10, fun finish. Repeat a trick you already know and finish with your best landing of the day. Then stop, even if you want one more try.
Each week, pick one focus trick and work on it all week. Do not try to learn five tricks in one week. When you can land your focus trick five times in a row, move on or add a variation, like doing it rolling instead of standing still.
Each month, go back and practise your ollie, shuvit and manual, because strong basics make every advanced trick easier.
What Are the Advanced Tech Deck Tricks?
Level 3 has seven advanced tricks that need strong pop, clean timing and good board control. Start them once your Level 2 tricks are solid, and pick one trick at a time. These tricks take weeks or months each, and that is normal.
- 360 Flip. A full 360 degree spin and a kickflip at the same time. It teaches full flip plus full spin control.
- Hardflip. A kickflip that flips vertically, almost up and over. It teaches vertical flip control.
- Impossible. The board wraps vertically around your finger in the air. It teaches the wrapping roll motion.
- 50-50 Grind. Both trucks slide along a ledge or rail. It teaches grind balance and accurate landings.
- Boardslide. The middle of the board slides along a rail with the board turned sideways. It teaches slide control.
- Nose Slide and Tail Slide. A slide on the nose or the tail of the board. They teach one end balance on a ledge.
- 360 Shuvit. A full 360 degree spin without a flip. It teaches full spin control and scoop power.
12. 360 Flip (Tre Flip)
The 360 flip, often called a tre flip, is the most famous advanced fingerboard trick.
- How it works. The board does a full 360 degree spin and a kickflip at the same time. It needs a strong scoop and a clean flick, timed together.
- What it teaches. It teaches full flip plus full spin control, and it is the trick most riders dream of landing.
- How long it takes. Most people take weeks or months to land it cleanly. Learn the kickflip and the pop shuvit first.
From real use, a stronger scoop matters more than a harder flick. Scoop first, flick second.
13. Hardflip
The hardflip is a kickflip that flips vertically, almost like the board is flipping up and over.
- How it works. You pop hard and flick so the board flips in a vertical plane, not a flat spin. It moves differently from a normal kickflip.
- What it teaches. It teaches vertical flip control and precise flick timing, which are useful for many advanced tricks.
- How long it takes. Many riders find it one of the hardest tricks on this list, so expect a month or more of practice.
Keep the pop strong and the flick short. A long flick sends the board off line.
14. Impossible
The impossible is a trick where the board wraps vertically around your finger in the air.
- How it works. You scoop and lift so the board rolls around your finger, then you catch it as it comes back down. It looks impossible, which is where the name comes from.
- What it teaches. It teaches the wrapping roll motion and finger control in the air.
- How long it takes. Learn a good ollie and a clean pop shuvit first, because it uses the same scooping and wrapping motion. Expect several weeks.
Think of it as a roll, not a flip. The board wraps around your finger in a smooth circle.
15. 50-50 Grind
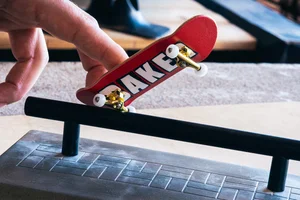
The 50-50 grind is the basic grind, and both trucks slide along a ledge or rail.
- How it works. You ollie onto a ledge or rail, land with both trucks on the edge, slide along it, and pop off at the end. Start on a low, wide ledge.
- What it teaches. It teaches grind balance and landing on a narrow surface, which every grind trick needs.
- How long it takes. Grinds need an ollie that lands accurately, so make sure your ollie is solid first. Expect two to four weeks.
- Full guide. Read the full step by step guide here: How to 50-50 Grind on a Tech Deck.
From real use, a smooth table edge makes a perfect first ledge, and it costs nothing.
16. Boardslide
The boardslide slides the middle of the board along a rail or ledge, with the board turned sideways.
- How it works. You ollie, turn the board 90 degrees, slide on its middle, then turn back and land. Keep the slide short at first.
- What it teaches. It teaches slide control and turning in the air, which you need for most rail tricks.
- How long it takes. Learn the 50-50 grind first, because the ollie onto the rail is the same. Expect two to three weeks.
Wax the ledge lightly if the board sticks. A smooth slide is a safe slide.
17. Nose Slide and Tail Slide
A nose slide slides on the nose of the board, and a tail slide slides on the tail.
- How it works. You ollie onto the ledge and balance on one end of the board while you slide. Both need a precise ollie and good balance.
- What they teach. They teach one end balance on a ledge, which is harder than a boardslide because you balance on one end, not the middle.
- How long it takes. Learn the 50-50 grind and the boardslide first. Expect three to six weeks of practice.
Keep your weight over the sliding end. If you lean back, the board slips off the ledge.
18. 360 Shuvit
The 360 shuvit is a full 360 degree spin without a flip, and it uses the same scoop as a shuvit.
- How it works. You scoop harder than a normal shuvit, so the board turns all the way around and comes back to you. The board stays flat.
- What it teaches. It teaches full spin control and scoop power, which you need for 360 flips later.
- How long it takes. Fix your 180 degree shuvit first, because a weak shuvit gives you a weak 360 shuvit. Expect two to four weeks.
Add power in small steps. Scoop a little harder each session until the board turns all the way around.
What Gear Do You Need for Tech Deck Tricks?
You do not need a lot of gear to learn the tricks on this list, and a standard Tech Deck is enough for Levels 1 and 2. What matters most is a board in good condition and a flat surface to practise on. Save the park gear for Level 3.
- What matters. A Tech Deck in good condition, with free spinning wheels and grip tape that still grips. A flat, hard surface like a desk or table. A little space to practise.
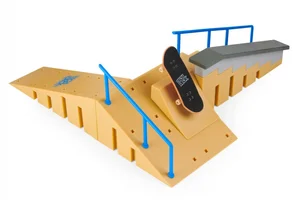
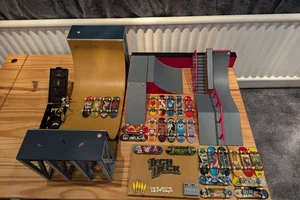
- What helps later. A fingerboard skatepark, a rail or a ledge for grinds and slides in Level 3. A book, a ruler or a pencil works as a first obstacle, and a smooth table edge works as a first ledge.
- What does not matter yet. An expensive professional fingerboard. A standard Tech Deck costs $10 to $20 in the USA, £8 to £15 in the UK and €10 to €20 in Europe, and it is the right board to learn on.
- Where to buy. See the full buying guide here: Best Tech Deck to Buy in 2026. It compares four picks with prices for the USA, UK and Europe.
- Build a park. When you are ready for ramps and rails, see the park guide here: Tech Deck Build-A-Park Guide. A full park set costs $25 to $50.
What Mistakes Should Beginners Avoid With Tech Deck Tricks?
Most beginners make the same five mistakes, and each one is easy to fix once you spot it. Read this list before your next session, because fixing one mistake can save you weeks of practice. The biggest mistake is rushing to advanced tricks too early.
- Trying advanced tricks too early. Trying a 360 flip before you can ollie feels like progress, but you are practising the wrong movement. Learn the list in order, because each trick teaches a skill the next trick needs.
- Practising too hard and too long. Long sessions make your fingers tired and your timing worse, so ten focused minutes a day beats an hour once a week. If your landings get worse during a session, stop and come back tomorrow.
- Using stiff fingers. Stiff fingers cannot slide, scoop or catch smoothly, so keep your fingers slightly curved and relaxed. If your hand is tense, shake it out, take a breath and start again.
- Ignoring the landing. Many beginners focus only on the pop or the flip and forget the landing, but a trick is not landed until all four wheels touch and you are back in control. Practise the catch as much as the trick itself.
- Copying videos without learning the basics. Watching videos is useful, but it is not a replacement for practice, so watch a trick once to understand the movement, then put the video away and practise it yourself.
What Are the Advantages and Disadvantages of Tech Deck Tricks?
Fingerboarding is a cheap, fun hobby you can do at home, but it has real downsides too. Here is an honest look at both sides, so you know what to expect before you spend money or time on it. The good news is that the downsides are small and easy to manage.
Advantages
- It is cheap to start. A standard Tech Deck costs $10 to $20, and you can practise on any table at home. You do not need a skatepark, a membership or special clothes.
- You can practise anywhere. A desk, a kitchen table or a smooth floor is enough, so you can fit ten minutes of practice into any day. Rain and cold weather never stop you.
- It builds real skills. Fingerboarding teaches balance, timing and patience, and every trick you learn makes the next one easier. Progress is easy to see and measure.
- It is fun to share. You can film your tricks, share them with friends and join a big online fingerboard community. Many riders learn new tricks from videos and friends.
Disadvantages
- Progress is slow. Advanced tricks take weeks or months to land cleanly, and that slow progress frustrates many beginners. You need patience to stick with it.
- Small parts wear out. Grip tape goes smooth, wheels get stuck and trucks loosen, so you will replace parts or buy a new board every few months. The cost stays low, but it never stops.
- It can hurt your fingers. Long sessions can make your fingers sore, and hard landings can jam a fingertip. Short sessions and breaks keep this problem small.
- It needs space at home. You need a clear table and a little room, and a board flying off the table can knock things over. Clear your space before you practise.
Frequently Asked Questions About Tech Deck Tricks
Here are the questions readers ask most about Tech Deck tricks, with short, direct answers. If your question is not here, start with the ollie guide and work through Level 1 in order. Most problems come from weak basics, not from the trick itself.
What is the easiest Tech Deck trick to learn?
The ollie is the easiest Tech Deck trick to start with, because it teaches the pop and slide every other trick needs. After the ollie, try the shuvit and the manual, which are the next easiest tricks on the list. Start with the ollie and work through Level 1 in order, and do not skip ahead.
How long does it take to learn all Tech Deck tricks?
It takes months to learn Level 1 and Level 2, and a year or more to land Level 3 tricks cleanly. Your timeline depends on how often you practise, not on talent. Ten minutes a day, every day, will get you further than one long session each week, so keep your practice short and regular.
Do I need a special Tech Deck to learn tricks?
No, any standard Tech Deck in good condition works for every trick on this list. Check that all four wheels spin freely and the grip tape still grips, because a stuck wheel or smooth grip makes every trick harder. A Performance Series board pops a little better, but it will not fix weak basics.
What is the hardest Tech Deck trick?
Most riders say the hardflip or the 360 flip is the hardest trick on this list. Both need strong pop, precise timing and clean board control, and both are Level 3 tricks for a reason. Do not try them until your Level 1 and Level 2 tricks are solid, or you will practise the wrong movements.
How do I get better at Tech Deck tricks faster?
Practise a little every day, learn the tricks in order, and focus on clean landings, not height or speed. Film yourself if you can, because watching your own fingers shows mistakes you cannot feel. Keep your basics sharp too, because a clean ollie makes every other trick easier.
Can I learn Tech Deck tricks without a skatepark?
Yes, you can learn every trick on this list at home on a desk or table. Only grinds and slides need a ledge or rail, and a smooth table edge works as your first ledge. A fingerboard park is nice to have later, but it is not needed for Levels 1 and 2.
What gear do I need to start fingerboarding?
You need a standard Tech Deck, a flat hard surface and a little space for Levels 1 and 2. A board costs $10 to $20 in the USA, £8 to £15 in the UK and €10 to €20 in Europe. Save ramps, rails and park sets for Level 3, when grinds and slides need them.
How much does a Tech Deck cost in 2026?
A standard Tech Deck costs $10 to $20 in the USA, £8 to £15 in the UK and €10 to €20 in Europe. Performance Series boards cost $12 to $20, starter sets $20 to $40, and a full Build-A-Park set $25 to $50. Buy a standard board first, because it handles every beginner trick.
Is TechDeckTrick.com the official Tech Deck website?
No, TechDeckTrick.com is an independent guide and is not affiliated with or endorsed by Tech Deck or Spin Master. We are fans who write step by step guides to help beginners learn. For official products and news, visit the Tech Deck website or your local toy shop.
Conclusion
So, in this article, we covered Tech Deck tricks in detail. You saw all 18 tricks, from your first ollie to the 360 flip, plus the finger placement, the 10 minute drill and the gear you need. You also learned the five mistakes that slow beginners down and the honest pros and cons of fingerboarding.
Here is my honest advice. Start with the ollie and do not move on until you can land five clean ollies in a row. Your ollie is the base for everything, so ten focused minutes a day on clean basics beats an hour of random tries.
Now pick your first trick from Level 1, practise the drill, and come back to this list when you are ready for the next one.
TechDeckTrick.com is an independent guide and is not affiliated with or endorsed by Tech Deck or Spin Master.