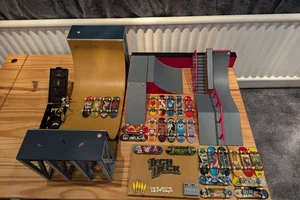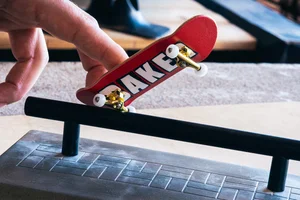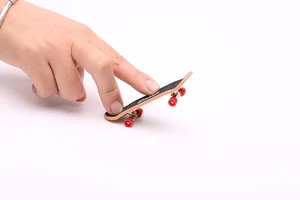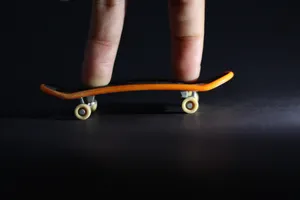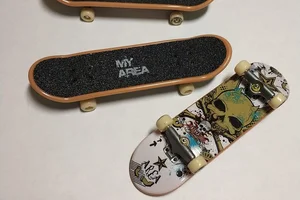
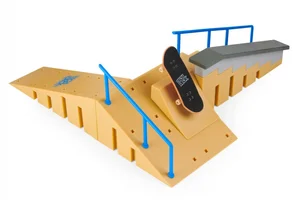
A Tech Deck Build-A-Park set turns your table into a real fingerboard park. This guide shows you what each set includes, which ramps and rails suit beginners, and how to set up a home park that grows with your skills. You will see starter combinations, prices for the USA, UK and Europe, and practice tips that make every session count.
You can ollie on a flat table, but tricks get boring when there is nothing to jump on, grind, or slide. A Tech Deck Build-A-Park set fixes that.
It gives you ramps, rails, and ledges that snap together on your table, so your home turns into a fingerboard park. The sets look small, but they change how you practise. A ramp teaches you air tricks. A rail teaches you grinds. A ledge teaches you slides.
Here is the thing. You do not need the biggest set to start. One ramp and one rail will keep you busy for months. This guide shows you what each set includes, which pieces suit beginners, and how to build a home park step by step.
What Is a Tech Deck Build-A-Park Set?
A Build-A-Park set is a box of fingerboard obstacles that snap together. It includes ramps, rails, ledges, and stairs that you arrange on a table to build a small skatepark. You can buy one set or join two sets to make a bigger park.
In practice, a set works like building blocks. Each piece has a flat base, and you can move them in seconds, so your park changes every time you practise. Most sets cost $25 to $50, and one set is enough for a beginner.
Which Ramps and Rails Are Best for Beginners?
Start with a quarter pipe ramp, a flat rail, and a low ledge. These three pieces teach air tricks, grinds, and slides. Skip the big stair sets until your ollie is clean.
- A quarter pipe ramp for air tricks. A small quarter pipe lets you ollie up, catch air, and roll back down. It is the best first ramp, because it teaches height and landing in one move.
- A flat rail for your first grinds. A low, straight rail is perfect for 50-50 grinds. It is close to the table, so a missed landing does not throw your board far.
- A low ledge for slides. A wide ledge forgives a landing that is slightly off centre. It is the best piece for learning boardslides after your 50-50 is clean.
If you are still choosing your first board, read our Best Tech Deck to Buy in 2026 guide first.
How Do You Set Up a Home Fingerboard Park on a Table?
Clear a table, place a ramp at one end, a rail in the middle, and a ledge at the other end. Leave space to roll in and roll out. Your park is ready in five minutes.
Here is a simple 5-step process to set up your park:
Step 1: Clear the Table
Remove books, cups, and cables. You need a flat space about the size of a laptop.
Step 2: Place the Ramp at the Back
Put your quarter pipe at the back edge of the table. It gives you a launch point and a place to roll back down.
Step 3: Put the Rail in the Middle
Place the rail across the middle of the table with space on both sides. You need room to ollie on and roll away.
Tip: leave at least one board length of flat table between pieces, so you have time to set up for the next trick.
Step 4: Add the Ledge at the Front
Put the ledge near the front edge, where you can reach it easily. It is the last obstacle in your line.
Step 5: Test the Line
Roll from the ramp to the rail to the ledge in one line. Move any piece that feels too close or too far, then try again.
Which Build-A-Park Combination Should You Start With?
Start with one Build-A-Park set plus a flat rail. That gives you a ramp, a ledge, and a rail for $25 to $50. It is the cheapest way to build a park that teaches every basic trick.
- One Build-A-Park set on its own. A single set costs $25 to $50 and includes a ramp and a ledge. It is the best pick if you are new and want to try park riding without spending much.
- One set plus a flat rail. Add a flat rail and your park can teach grinds too. This is the combination most riders start with, because it covers air tricks, grinds, and slides.
- Two sets joined together. Two sets make a big park with stairs and gaps. Buy this only when your ollie is clean and your 50-50 is solid.
How Can You Practise With Ramps and Rails in 10 Minutes a Day?
Spend ten minutes a day on one line: ramp, rail, ledge. Ride the same line every day until it feels easy, then change one piece and learn it again.
Minutes 0 to 2: Warm-up ollies on the flat table. Do five clean ollies to wake up your fingers.
Minutes 2 to 6: Ride the line slowly, one obstacle at a time. Ollie up the ramp, grind the rail, slide the ledge. Go slow. Speed comes later.
Minutes 6 to 8: Practise your weakest obstacle only. If your grind is weak, grind the rail ten times. Fix one weak spot each day.
Minutes 8 to 10: Full line, three times. Put it all together: ramp to rail to ledge, three times in a row.
From real use, riders who practise one line a day learn park tricks twice as fast as riders who jump between random obstacles.
What Should You Buy After Your First Park Set?
Buy a second Build-A-Park set to make your park bigger, or a Performance Series board for better pop. Both options build on the park you already have, so pick the one that matches your next goal. A bigger park teaches longer lines, while a better board improves every trick.
- Best Tech Deck to Buy in 2026. Compare boards and sets with real prices for the USA, UK and Europe before you spend more.
- How to 50-50 Grind on a Tech Deck. Your rail and ledge are waiting. Learn the grind that turns park pieces into tricks.
- Tech Deck Tricks: The Complete List. See which tricks use ramps, rails, and ledges, and learn them in the right order.
Frequently Asked Questions
Here are the questions beginners ask most about Build-A-Park sets. Each answer is short and direct, so you can set up your park fast. If your question is not here, the setup guide above covers ramps, rails and combinations.
What is included in a Tech Deck Build-A-Park set?
A Build-A-Park set includes ramps, rails, ledges, and stairs that snap together on a table. Most sets have one ramp, one ledge, and one rail. The pieces have flat bases, so they sit steady on a table. One set costs $25 to $50.
How much does a Tech Deck Build-A-Park set cost?
A Build-A-Park set costs $25 to $50. Prices change by shop, so check Amazon and one local shop first. A single set is enough for a beginner. Two sets make a bigger park. A second set is worth it only once your ollie is clean.
What is the best ramp for a beginner fingerboarder?
A small quarter pipe is the best ramp for a beginner. It teaches you to ollie up, catch air, and roll back down in one move. It is low, so a missed landing does not throw your board far. Start with a quarter pipe, then add more ramps.
Can I build a fingerboard park without buying a set?
Yes. A stack of books makes a ledge, a phone stand makes a rail, and card makes a ramp. Many riders start with household items and buy a set later. Home items work fine for learning, but a real set sits steady and lasts longer.
How big should my home fingerboard park be?
Start small, about the size of a laptop. One ramp, one rail, and one ledge fit there and teach every basic trick. A bigger park looks fun, but it spreads your practice thin. Grow your park one piece at a time, only when the old ones feel easy.
Do I need a special table for a fingerboard park?
No. Any flat, hard table works for a fingerboard park. A desk, a kitchen table, or a smooth board on your lap all work well. The table must be hard, because a soft surface stops the board from rolling. Clear the table first, then place your pieces.
What tricks can I learn on a Tech Deck Build-A-Park set?
A Build-A-Park set teaches ollies over gaps, 50-50 grinds on rails, boardslides on ledges, and air tricks on ramps. It also teaches lines, which means riding three obstacles in a row without stopping. Start with the ollie and the 50-50 grind, then add a kickflip later.
Is a Tech Deck Build-A-Park set good for kids?
Yes. A Build-A-Park set is good for kids, because the pieces are small, light, and easy to move. Kids can build a new park in minutes. Start with one set and a single board. The pieces have no sharp edges, and the park fits on a table.
Advantages and Disadvantages of a Tech Deck Build-A-Park Set
A Build-A-Park set turns a plain table into a skatepark, but it is not right for every rider. Here is an honest look at both sides before you buy. Knowing both sides helps you spend your money on the right pieces.
Advantages
- You get a full park in one box. Ramps, rails, ledges and stairs snap together, so you can build a park in five minutes without buying pieces one by one.
- It grows with your skills. You can join two sets to make a bigger park, so the same pieces teach beginner lines first and longer lines later.
- It makes practice fun. A park turns boring flat ground practice into real lines with ramps and rails, so you practise longer without getting bored.
Disadvantages
- It costs more than a single board. A full park set costs $25 to $50, which is more than double the price of a standard board, so it is a real purchase.
- It needs table space. A full park takes up a whole table, so you need a clear space at home and a place to store the pieces when you finish.
- Small pieces get lost. The park has many small parts, and losing one rail or ramp piece can leave a gap in your park until you replace it.
Conclusion
So, in this article, we covered Tech Deck Build-A-Park in detail. You learned what each set includes, which ramps and rails suit beginners, and how to set up a home park on a table. You also saw starter combinations, prices, and a 10 minute drill for park practice.
Here is my honest advice. Start with one set and one rail. That small park will teach you more in a month than a big park teaches in a week, because you will ride the same line until it feels easy. Your table is the park, your fingers are the rider, and the pieces are just tools. Now go build your park, then read our Best Tech Deck to Buy in 2026 guide to pick your next board.
TechDeckTrick.com is an independent guide and is not affiliated with or endorsed by Tech Deck or Spin Master.